

I’m writing this on a laptop I bought in 2019. Seven years, thousands of hours of use, and it still boots in under fifteen seconds. That’s not luck — it’s the result of a maintenance routine I’ve refined over two decades of testing gear for a living. Most people treat their laptops like disposable electronics, replacing them every three or four years when things start feeling sluggish. But here’s the truth almost nobody in the tech press will tell you: the vast majority of laptop “deaths” are preventable. The battery didn’t just die — you cooked it. The performance didn’t vanish — your thermal paste dried up three years ago. The storage didn’t fail — you never gave it room to breathe.
After testing hundreds of machines and nursing my own hardware well past its expected expiration date, I’ve developed a playbook for laptop longevity. It’s not complicated, it’s not expensive, and it doesn’t require you to be a hardware engineer. What it does require is consistency and a willingness to treat a $1,500 machine like it’s actually worth maintaining. Let me walk you through exactly what I do, why it works, and the specific gear that makes it possible.
Let’s start with the component everyone worries about
The Battery Myth That’s Costing You Hundreds
Let’s start with the component everyone worries about and almost everyone kills prematurely: the battery. Lithium-ion cells degrade — that’s chemistry, not opinion. But the rate of degradation is almost entirely within your control. The single worst thing you can do is keep your laptop plugged in at 100% all day, every day. I’ve seen people do this for years and then act shocked when their battery holds forty minutes of charge. That’s like leaving your car engine revving in the driveway and wondering why the motor’s shot.
Here’s what actually works: keep your charge between 20% and 80% whenever possible. Most modern laptops — MacBooks, Dells, Lenovos, ASUS machines — have a built-in battery health feature that caps charging at 80%. Turn it on. Right now. I mean it. On macOS, it’s called Optimized Battery Charging. On Windows machines from Dell, Lenovo, and others, you’ll find it in the manufacturer’s control panel or in the BIOS. If your laptop doesn’t have this feature natively, you can pick up a smart plug with scheduling to automate charging windows — I’ve done this with older machines and it works surprisingly well.
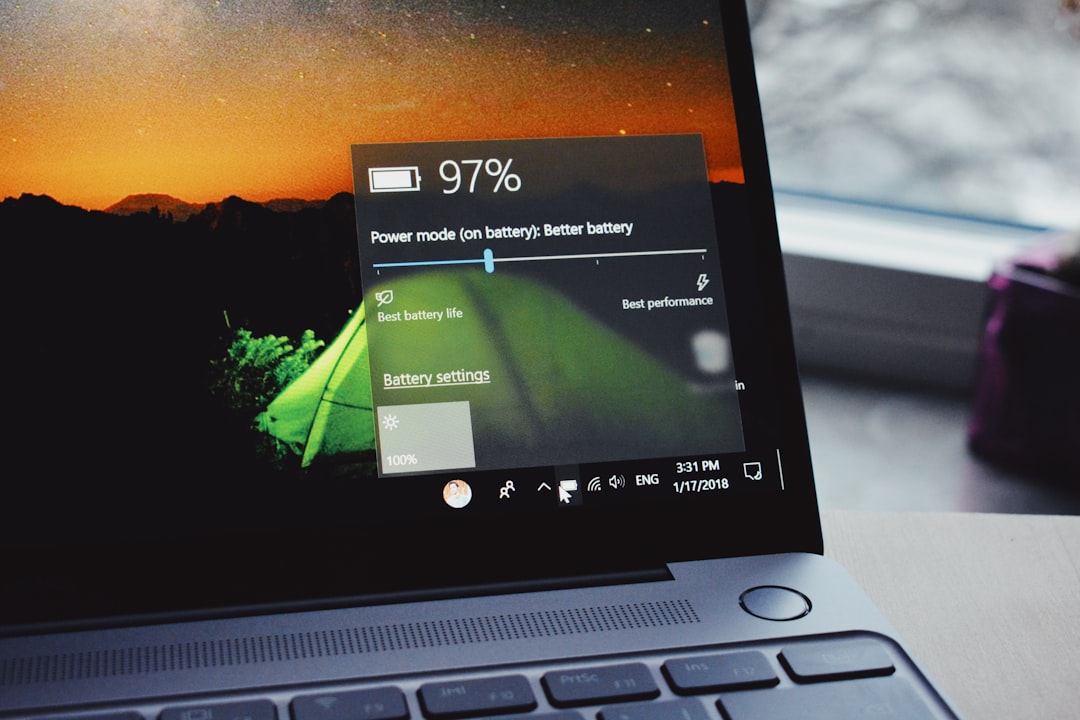
Temperature is the other silent killer. Heat accelerates chemical degradation inside lithium-ion cells exponentially. If your laptop runs hot enough that the chassis is uncomfortable on your lap, the battery is suffering — even when it’s not actively charging. This is one of the reasons I’m evangelical about quality cooling pads. Not the cheap plastic ones that whisper warm air. I’m talking about pads with actual fan RPM control and decent airflow engineering. They’re not glamorous, but a thirty-dollar investment here can add two full years to your battery’s useful life.
Thermal Maintenance: The Job Nobody Reminds You To Do
Every laptop ships with thermal compound sandwiched between its processor and the heat sink. That compound fills microscopic gaps and ensures efficient heat transfer. Over time — typically three to five years — it dries out, becomes brittle, and stops doing its job. Your CPU starts running hotter. The fans spin louder. Performance throttles kicks in more aggressively. You assume the machine is “getting old” when really it just needs thirty minutes of attention and a five-dollar tube of paste.
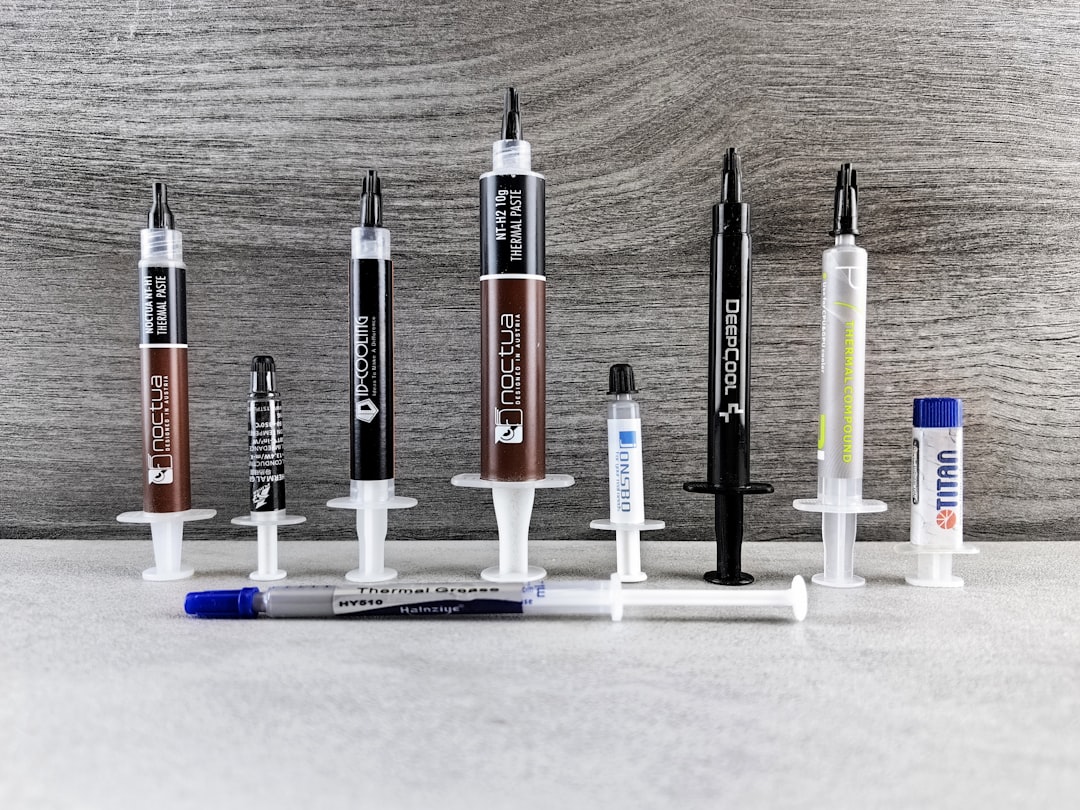
I repaste my laptops every three years, no exceptions. It sounds intimidating if you’ve never opened a laptop before, but most modern machines make it surprisingly accessible. You’ll need a decent precision screwdriver set, some isopropyl alcohol for cleanup, and the thermal paste itself. I’ve had consistently good results with premium thermal compounds — they’re designed to handle the tight tolerances and high heat density of laptop CPUs and GPUs. There are plenty of YouTube tutorials for your specific model, and the whole process takes about half an hour once you’ve done it a couple of times.
While you’ve got the machine open, take a hard look at the fan assemblies and heat sink fins. Compressed air from the outside helps, but nothing compares to blowing dust out from inside the chassis with the bottom panel removed. I do this every six months as part of what I call my “laptop health day” — a Sunday morning ritual that takes maybe forty-five minutes and keeps my machines running like new. A reusable electric duster pays for itself after a few uses and is far more effective than disposable cans.
The Upgrade That Feels Like a New Machine
Here’s something the laptop industry doesn’t want you to know: in many cases, the single biggest performance leap you can give an aging laptop isn’t a new processor — it’s a storage upgrade. If your machine is still running on a SATA SSD or, heaven forbid, a spinning hard drive, swapping in an NVMe drive will make it feel like you bought a completely new computer. Boot times drop to seconds. Applications open instantly. File transfers that used to drag on for minutes complete in seconds. I’ve done this upgrade on machines dating back to 2016 and the results are consistently dramatic.
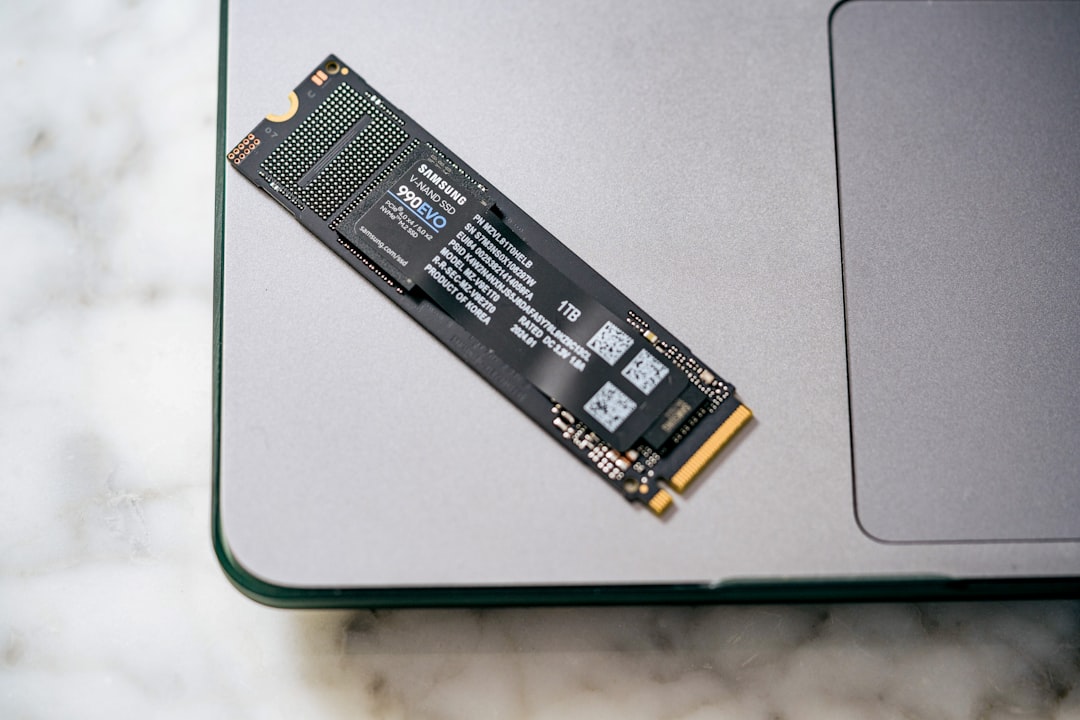
Even if you already have an NVMe drive, upgrading to a newer, faster model with DRAM cache and TLC NAND can meaningfully improve sustained write performance — especially if you do anything that involves large files like video editing or local AI workloads. Check your laptop’s compatibility first (some solder their storage to the board — I’m looking at you, entry-level MacBooks), but most Windows machines from the last several years use standard M.2 slots. A 2TB NVMe SSD costs less than a hundred dollars at this point and is one of the highest-value upgrades you can make to any computer.
Don’t throw away the old drive, by the way. Drop it into a USB-C external enclosure and you’ve got a blazing-fast portable drive for backups or extra storage. I’ve built a small fleet of these over the years — they’re incredibly handy for moving large projects between machines or keeping offline backups of important work. If you want to go deeper on portable storage, I put together a full breakdown of the portable SSDs that actually survive real life that’s worth a read.
Physical Care: The Unsexy Stuff That Matters Most
I’ve seen laptops that cost $2,500 look like garbage after two years because their owners never cleaned the keyboard, never wiped the screen with anything other than a shirt sleeve, and tossed them into backpacks without a second thought. A little physical maintenance goes a long way. The keyboard is your first line of defense — crumbs, dust, and skin oils accumulate between keys and eventually make their way into the chassis. I use a soft-bristle brush and compressed air weekly, and it takes about two minutes.
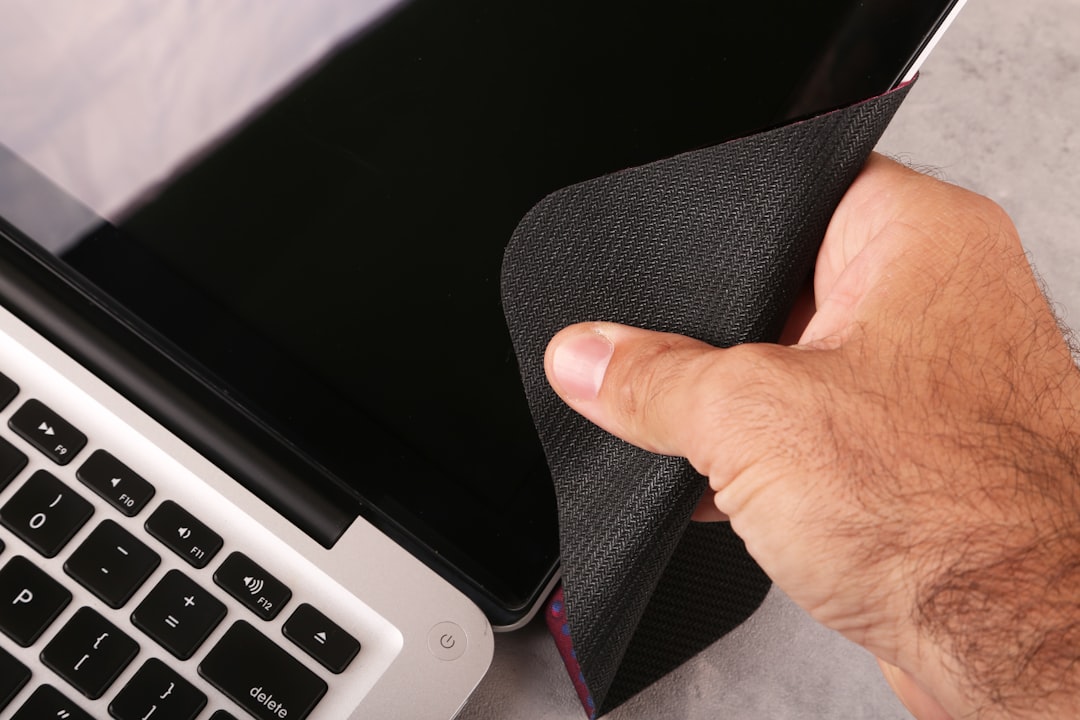
The screen matters too. Never use glass cleaner or paper towels — both will degrade the anti-reflective coating over time. A proper microfiber screen cleaning kit with a gentle spray solution costs under ten dollars and will keep your display looking like new for years. This isn’t vanity — a clean screen reduces eye strain, which matters more than most people realize if you’re staring at it for eight-plus hours a day.
And please, use a good case or sleeve. Not the floppy neoprene one you got as a freebie at a conference. A proper hard-shell sleeve with corner protection absorbs the bumps and drops that eventually loosen internal connections, crack chassis panels, and damage displays. I’ve dropped laptops in good cases and walked away without a scratch. I’ve also seen a $2,000 MacBook sustain a cracked screen from a two-foot fall onto a carpeted floor because it was bare. Don’t be that person.
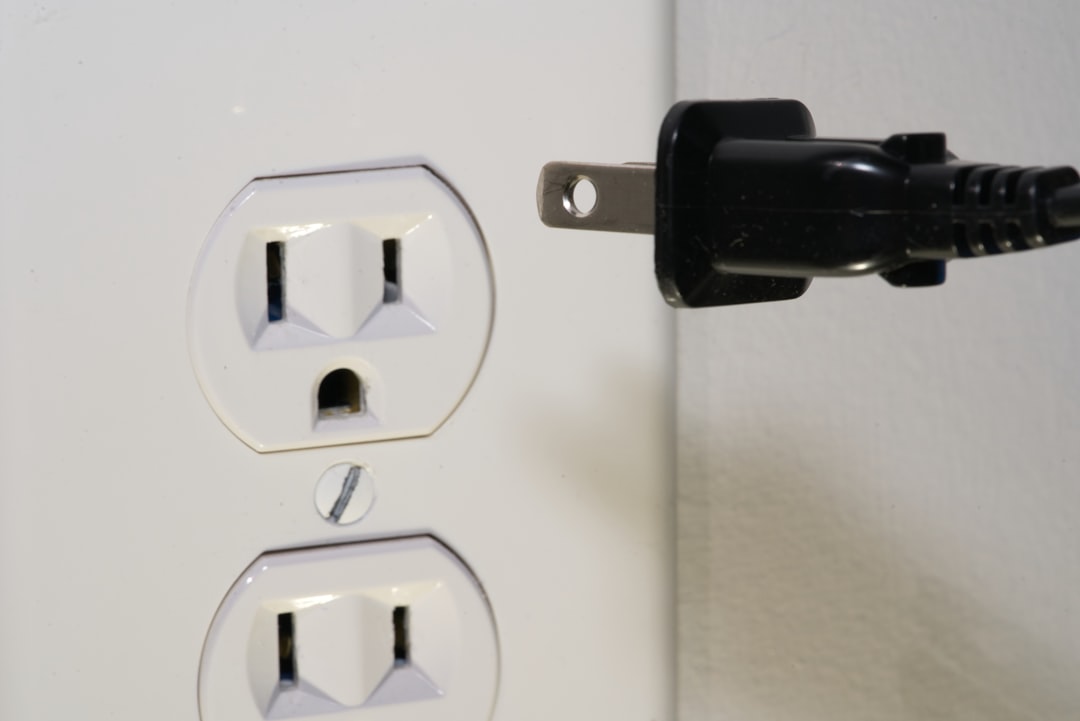
Power Protection: Your Invisible Insurance Policy
This is the section where most people tune out, and it’s exactly why I’m putting it here. A single power surge can fry your motherboard, kill your charger, or corrupt your storage. It happens more often than you’d think — especially in older buildings, during storms, or in homes with lots of high-draw appliances cycling on and off. I plug every laptop I own into a UPS with surge protection and battery backup. Not a power strip — a real uninterruptible power supply.
A good UPS does two critical things: it conditions the power coming into your laptop (smoothing out the small surges and dips that slowly degrade internal components), and it gives you time to save your work and shut down gracefully during an outage. Sudden power loss during a write operation is one of the most common causes of SSD corruption, and SSD corruption at the wrong moment can mean losing everything. I consider a UPS non-negotiable for any machine I care about. They cost fifty to a hundred dollars, last for years, and have saved my bacon more times than I can count.
Software Hygiene: Stop Choking Your Machine With Junk
Hardware maintenance is only half the equation. Over time, most laptops accumulate a layer of software cruft that slowly strangles performance. Startup programs multiply. Background processes eat RAM and CPU cycles. Temporary files pile up on your storage. The registry on Windows machines becomes a labyrinth of orphaned entries. None of this is dramatic enough to notice on any given day, but cumulatively it turns a fast machine into something that feels like it’s wading through molasses.
My approach is simple: every six months, I do a clean operating system install. Back up everything important, wipe the drive, and start fresh. On macOS, this means a clean install from recovery mode. On Windows, the built-in reset function with the “Remove everything” option works well. It sounds drastic, but with cloud sync for documents and modern app installations that pull preferences from the cloud, it’s honestly not that much work anymore. And the performance difference is night and day. Every machine I’ve done this to feels years younger afterward.
If a full reinstall feels like too much, at minimum go through your startup programs and disable everything non-essential. On Windows, Task Manager’s Startup tab is your friend. On macOS, check System Settings → General → Login Items. You’ll probably find things you don’t even remember installing. Kill them. Your boot time and available RAM will thank you immediately. If you want more tips on setting up a machine for long-term productivity, my guide on building a future-proof home office covers the broader ecosystem.
The Repair-vs-Replace Decision Framework
At some point, every laptop reaches a crossroads: repair or replace. Here’s how I make that call. If the repair costs less than thirty percent of a comparable new machine’s price and addresses a single component — battery, storage, RAM, keyboard — I almost always repair. These are wear items, not signs of systemic failure. A new battery for a four-year-old laptop costs a fraction of what you’d spend on a replacement, and it gives you another two to three years of service.
The exception is when the motherboard or display fails on a machine that’s more than five years old. At that point, you’re often better off investing in new hardware, especially if your current machine can’t run the software you need or is missing modern features like USB-C charging, Wi-Fi 6, or a current-generation processor. But for everything short of a catastrophic failure, repair almost always wins on value. I’ve been particularly happy with third-party replacement battery kits for older machines — they’re affordable and often include the tools you need.
My Semi-Annual Laptop Health Checklist
Let me leave you with the actual routine I follow twice a year, once in spring and once in fall. It takes less than an hour and has kept every machine I own running well past its sell-by date:

- Battery health check: Run a battery report (Windows:
powercfg /batteryreport; macOS: System Information → Power). Note the full charge capacity versus design capacity. Below 70%? Time for a replacement. - Thermal assessment: Run a stress test and monitor temperatures. If your CPU is hitting 95°C+ under sustained load, it’s time for a repaste and fan cleaning. I use a quality adjustable laptop stand year-round to improve airflow — if you haven’t already, check out my full laptop stand recommendations for options that actually make a difference.
- Storage audit: Check free space (keep at least 20% free), run a SMART health check, and clean out large unnecessary files.
- Physical cleaning: Compressed air through vents and keyboard, microfiber screen cleaning, inspect ports for debris.
- Software refresh: Update the OS, remove unused programs, disable unnecessary startup items, run a full malware scan.

That’s it. Nothing exotic, nothing expensive, nothing that requires a degree in electrical engineering. Just consistent attention to the basics. The tech industry profits from the assumption that laptops are disposable — they’re not. Treat yours right and it’ll serve you well for far longer than the two-year upgrade cycle they’d prefer you follow. I’ve got the seven-year-old machine to prove it.
One thought on “The Laptop Longevity Playbook: How I’ve Kept the Same Machine Running for Seven Years”