

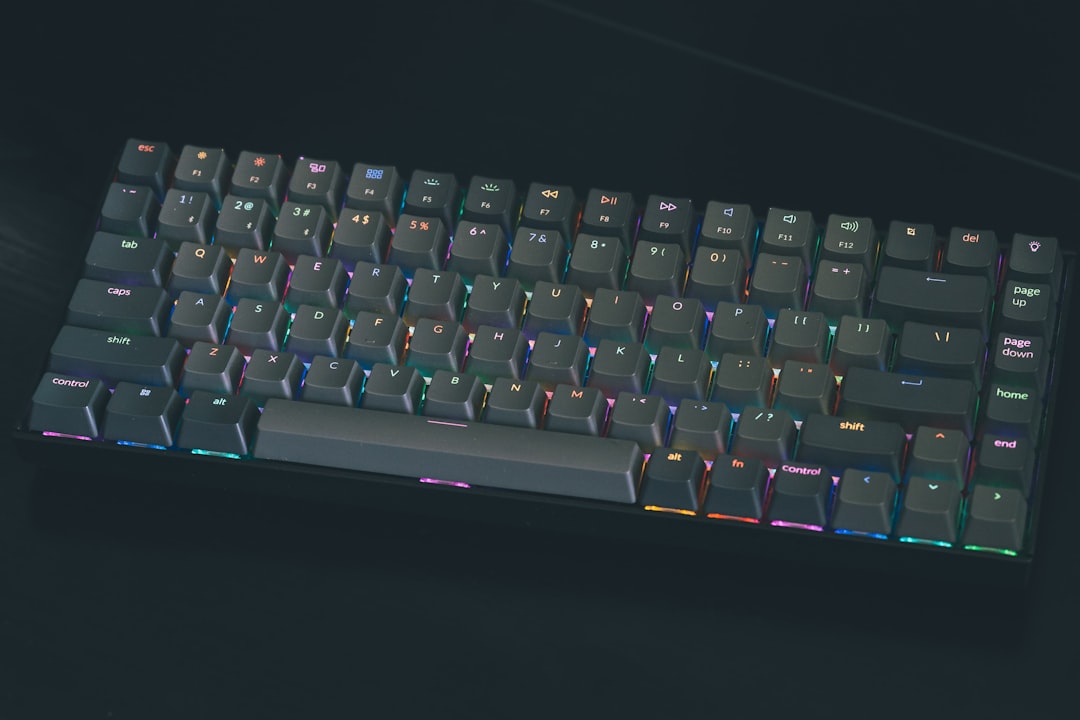
I’ve spent the last two decades typing on everything from mushy membrane keyboards to custom-built mechanical boards with hand-lubed switches. After testing hundreds of keyboards and building more than a dozen custom boards, I can tell you one thing with absolute certainty: the switch is everything. You can have the most beautiful aluminum chassis and RGB lighting that syncs with your heartbeat, but if you hate typing on it, you’ll never use it. Let me walk you through what you actually need to know about mechanical switches so you can stop reading reviews and start typing.
What Makes a Switch Feel the Way It Does
Every mechanical switch works on the same basic principle: a spring pushes a stem up, and when you press down, the stem activates an electrical contact. But it’s what happens in that 4mm of travel that separates a switch you’ll love from one you’ll want to throw across the room. Three factors determine how a switch feels: actuation force (how hard you need to press), travel distance (how far the key moves), and tactile feedback (what you feel mid-press). Think of it like testing mattresses at a store—you can read all the specs you want, but until you lay down and feel the difference between plush and firm, you’re just guessing.
The actuation point—the moment the switch actually registers a keypress—typically happens around 2mm into the 4mm total travel. That means you can type without fully bottoming out the key, which is why experienced mechanical keyboard users often type faster and with less fatigue. The force required varies dramatically, from feather-light 35-gram switches that register with a whisper to hefty 100-gram switches that demand a deliberate press. Most people fall somewhere in the 45-60 gram sweet spot, which feels about right for sustained typing sessions without accidental keypresses. Switch testers let you sample different weights before committing.
Linear Switches: Smooth and Consistent
Linear switches are the minimalist’s choice. No click, no bump, just smooth movement from top to bottom. That sounds boring until you spend a week typing on them and realize how little effort it takes to fly across the keyboard at 100 words per minute. I’ve been using linears for my daily driver for three years now, and every time I switch back to anything else, I feel like I’m typing through molasses. They’re particularly popular with gamers who need rapid double-taps and programmers who spend all day coding and don’t want finger fatigue.
Red switches from Cherry MX are the classic linear—45 grams of force, smooth travel, and utterly predictable. But the switch world has exploded beyond Cherry’s offerings. Gateron Yellow linears have become the community darling for custom builds because they’re smoother out of the box than Cherry Reds and cost half as much. NovelKeys Creams are another favorite among enthusiasts, though they’ll cost you more and benefit from some lubing. If you’re coming from a laptop keyboard and want that minimal-effort feel, or you game competitively and need zero resistance between thoughts and actions, linears are your path. Just be aware that the lack of tactile feedback means you’ll sometimes find yourself hovering over a key wondering if you actually pressed it. Gateron Yellow switches are widely available for custom builds. If you’re looking for complete keyboard recommendations with pre-installed switches, I’ve covered the best mechanical keyboards for programming and coding in a separate guide.

Tactile Switches: The Satisfying Bump
Tactile switches give you a little bump partway through the keypress—that moment of resistance telling you “yes, the key registered.” It’s a small detail, but once you train your fingers on it, you’ll never mistype another password. I recommend tactile switches for most people because they provide clear feedback without the noise that drives your cubicle mates crazy. The trick is finding the right bump intensity. Some switches offer a gentle nudge, while others feel like driving over a speed bump.
Cherry MX Browns are the safe middle ground—a subtle bump that’s noticeable but not obtrusive. They’re the “Goldilocks” switch for first-time mechanical keyboard buyers, and countless office workers have made the switch (pun absolutely intended) without annoying their colleagues. But if you want something more pronounced, Holy Panda X switches deliver a rounder, more satisfying bump that’s become legendary in the custom keyboard scene. Zeal PC Zilents are another premium option, though they’re pricey and often out of stock. If you type all day and want that confirmation that each keypress registered without the sound of a machine gun going off, tactiles are your best bet. Cherry MX Brown keyboards are easy to find from major manufacturers.

Clicky Switches: Not for Open Offices
Clicky switches combine tactile feedback with an audible click—you feel and hear when each key activates. They’re incredibly satisfying, like using a typewriter from the 1950s, but they’re also the reason mechanical keyboards got banned from offices everywhere. I have a clicky board I use at home when I’m feeling nostalgic, and the sound drives my wife absolutely bonkers. Use these only if you work alone, have generous coworkers, or enjoy being that person in the coffee shop.
Cherry MX Blues are the classic clicky switch—sharp tactile bump plus a loud click that announces to everyone in the room that yes, you are indeed working. NovelKeys Box Navies take things even further with an even louder click and sharper bump. Some people find clicky switches exhausting because the extra force required to overcome the click adds up over thousands of keystrokes per day. Others swear they can’t type as fast on anything else because the auditory feedback creates a rhythm that keeps them in the flow. If you’ve never tried a mechanical keyboard and you work from home, I’d actually recommend starting with a clicky switch just to experience what all the fuss is about. You can always swap it out later. Cherry MX Blue keyboards deliver that classic mechanical sound.
Switch Mounts: 3-Pin vs 5-Pin
Before you buy switches, you need to know about pin configuration. Most modern switches come in either 3-pin or 5-pin varieties, and they’re not interchangeable without modifications. The extra two pins on 5-pin switches provide stability in the socket, but they won’t fit in hotswap keyboards designed for 3-pin switches. Most hotswap PCBs support 5-pin switches now, but budget boards and older models often only accept 3-pin. The good news is you can clip the extra two pins off 5-pin switches with flush cutters if needed, though it’s annoying extra work. When buying switches, check what your keyboard supports. If you’re building from scratch, 5-pin is the safer bet for future compatibility.
This matters more than you might think. I once bought 200 beautiful lubricated switches for a build only to realize they were 5-pin and my PCB only accepted 3-pin. Spent an hour with needle-nose pliers carefully clipping those extra pins, cursing myself the entire time. Save yourself the hassle and check compatibility first. Most hotswap mechanical keyboards these days support both, but it’s worth verifying. For more productivity tool recommendations this season, check out my Spring Tech Refresh guide.
Lubing Switches: Worth It or Overhyped?
Here’s where mechanical keyboard enthusiasts lose most normal people. Yes, you can buy unlubricated switches and manually apply lubricant to the springs and stems to make them smoother and reduce spring ping (that metallic “ping” sound some switches make). Yes, it makes a difference in feel and sound. No, most people don’t need to bother with it unless you’re building a premium custom board. Factory-lubed switches from Gateron, NovelKeys, and other reputable brands are perfectly smooth for 95% of users.
If you do decide to lube your own switches, you’ll need Krytox 205g0 or Tribosys 3203, a tiny brush, and about 20-30 minutes per 100 switches. It’s meditative work that some people find oddly satisfying. I’ve done it exactly once, decided it wasn’t for me, and now just buy pre-lubed switches. Your mileage may vary. The improvement is real—smoother travel, more consistent feel across all switches, reduced noise—but it’s diminishing returns once you’re already using quality factory-lubed switches.
Optical and Hall Effect Switches: The New Wave
Traditional mechanical switches use metal contacts that eventually wear out after millions of keystrokes. Optical switches use light instead—break a beam, register a keypress. They last longer (up to 100 million actuations vs 50 million for mechanical), debounce instantly (no more missed rapid keypresses), and some offer adjustable actuation points. I’ve been testing optical switches for six months, and while they’re technically superior in every measurable way, they feel slightly different—more digital, less organic. Not bad, just different.
Razer’s Optical switches and Flaretech’s optically-mechanical switches are the big players here. They’re worth considering if you’re a competitive gamer or just want a board that will outlast you. Hall Effect switches take it further with magnetic actuation that lets you adjust actuation point via software—set it to register at 1mm for gaming or 3mm for typing. I tried a Hall Effect keyboard recently, and being able to dial in the exact actuation point felt like having a superpower. These technologies are still relatively expensive and not widely available, but they represent where keyboards are heading.

Low-Profile Switches: For Laptop Converts
If you’re coming from a laptop keyboard and can’t get used to the tall travel of traditional mechanical switches, low-profile options might bridge the gap. They use shorter stems and reduced travel (typically 3mm instead of 4mm) while maintaining the mechanical feel. Cherry MX Low Profile and Kailh Choc switches are the main contenders here. I’ve built both high and low-profile boards, and I honestly prefer low-profile for laptop-style keyboards—it feels more natural for those of us who split time between desktop and laptop. The tradeoff is switch variety. You won’t find the same range of options in low-profile form factor, and some exotic switches simply don’t exist in low-profile versions.
Where to Actually Buy Switches
Now that you know what you want, where do you get them? Amazon carries Cherry MX switches and some Gateron options, but for the full range of boutique switches, you’ll need specialist retailers. KBDfans, MechMarket, and NovelKeys carry the enthusiast-grade stuff. Expect to pay $0.30-0.60 per switch for standard options, or $1.00+ per switch for boutique varieties. That’s $30-60 just for switches on a tenkeyless board, plus the cost of the keyboard itself. Budget accordingly. If you’re buying a prebuilt keyboard rather than building from scratch, most manufacturers offer multiple switch options—read reviews, watch typing videos, and choose what sounds best to your ears.
My Personal Recommendations
After all these years testing switches, what do I actually recommend? For most people buying their first mechanical keyboard, get a board with Cherry MX Browns if you type in shared space, or Cherry MX Blues if you work from home and want that classic mechanical feel. They’re predictable, widely available, and you’ll have no trouble finding replacement parts or upgrades later. If you’re building a custom board and want the best typing experience regardless of price, get Gateron Yellow Ink linears or Holy Panda X tactiles—lubricated from the factory. Gamers should look into Razer Optical or Hall Effect switches for that extra edge in responsiveness. And if you’re still not sure after reading all this, buy a switch tester with a dozen different options and spend a week typing on each. The right switch is personal—what feels amazing to me might feel terrible to you. Trust your fingers, not the hype.
The perfect switch doesn’t exist, but the perfect switch for you definitely does. Once you find it, you’ll understand why mechanical keyboard enthusiasts spend hundreds of dollars and dozens of hours chasing that ideal feel. There’s something deeply satisfying about typing on a board that feels like an extension of your thoughts, with every keypress providing exactly the feedback you need. Start with something middle-of-the-road, pay attention to what you like and don’t like, and iterate from there. Your hands will thank you.