
Two months ago, I walked into my home office, looked at the tangle of cables snaking across my desk, and had a moment of clarity: this setup was actively making me less productive. My monitors sat at the wrong height, my keyboard tray wobbled on a cheap plastic stand, and finding a charging cable required an archaeological dig through a drawer of tangled cords. Something had to change.
I’m Marcus, and I’ve been testing tech gear professionally for over two decades. I’ve reviewed thousands of devices, but somehow my own workspace had become the worst advertisement for the products I cover. So I tore it all down — every cable, every gadget, every accessory — and rebuilt it from the ground up. Here’s what I learned, what worked, and what I’d skip if I could do it over again.
Starting With the Surface: Why Your Desk Matters More Than Your Specs
Most people obsess over which laptop or monitor to buy and treat the desk itself as an afterthought. That’s backwards. Your desk is the foundation of everything you do. I spent three weeks testing an electric standing desk before settling on one that could handle my dual-monitor setup without wobbling at standing height. The difference between a $200 flimsy particle-board table and a proper motorized desk is night and day — not just for your posture, but for how stable everything feels when you’re typing at speed.
The standing desk debate has been going on for years, and I’ll be honest: I don’t stand all day. But having the option to raise my desk during afternoon slumps or lower it when I want to lean into a writing session? That flexibility changes how I work. I also added a large desk pad that covers most of the surface — it protects the desktop, provides a consistent mousing area, and honestly just makes the whole thing look more intentional. Small upgrade, surprisingly big impact.
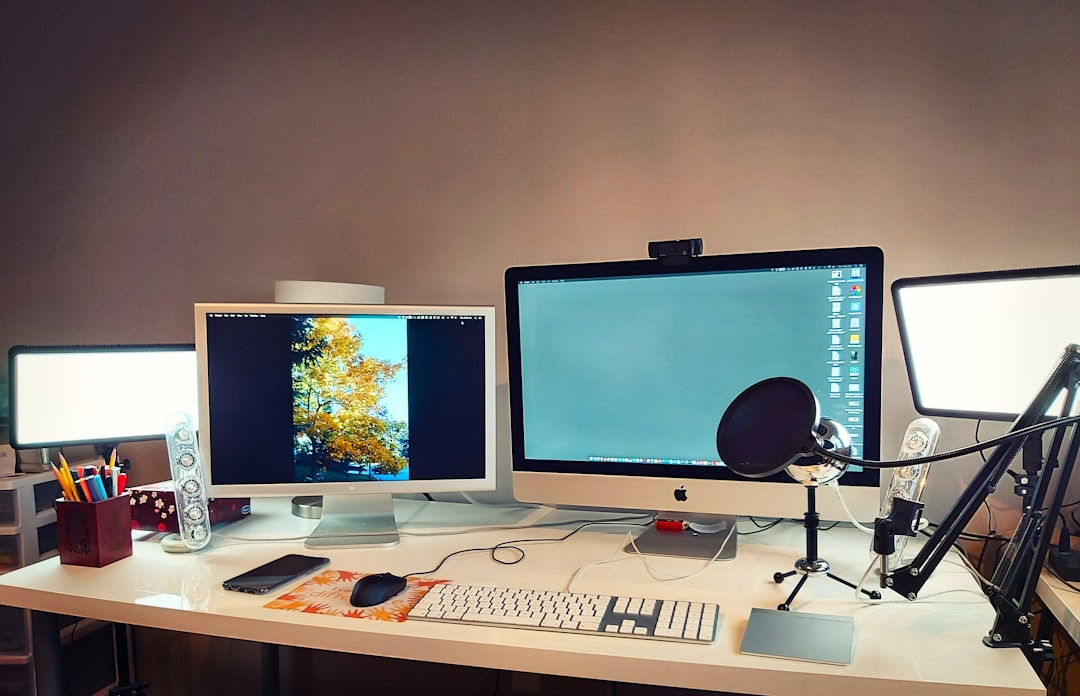
The Monitor Situation: Arms, Angles, and Why I’ll Never Go Back to Stands
If there’s one single upgrade that transformed my workspace, it’s replacing my monitor stands with arms. I tested several options recently and wrote up my findings, but the short version is this: monitor arms reclaim an absurd amount of desk space and let you position screens at exactly the right height and angle for your body. No more stacking books under a monitor stand or craning your neck downward for eight hours.

I run a 27-inch 4K primary display paired with a 24-inch vertical secondary screen for chat windows and reference material. The vertical monitor was a experiment that stuck — reading documentation, Slack threads, and email in portrait mode feels natural, like reading a page. With both on arms, I can swing them out of the way when I need desk space for hardware testing, then pull them back into position in seconds. If you’re still using the stands that came in the box, you’re leaving usable desk real estate on the table.
Cable Management: The Unsexy Upgrade That Changes Everything
I need to be real about something: cable management is boring. Nobody gets excited about zip ties and adhesive clips. But spending a Sunday afternoon routing cables properly — using an under-desk cable tray, Velcro straps instead of zip ties (so you can actually adjust things later), and routing power cables along the desk legs — transformed not just how my desk looked but how I felt sitting at it. There’s something about a clean workspace that reduces that low-level mental clutter you don’t notice until it’s gone.
The total cost for cable management was under $40. A decent cable management kit gives you everything you need: trays, clips, sleeves, and Velcro ties. The trick is to do it all at once rather than piecemeal — run every cable, test that everything works, then bundle and secure. Doing it cable-by-cable never works because you’re always rearranging the ones you already managed.
Keyboard and Input: Finding What Actually Feels Right
I’ve tested dozens of keyboards over the years, and the one sitting on my desk right now isn’t the most expensive or the most feature-packed — it’s the one that feels right after eight hours of typing. For me, that’s a compact mechanical keyboard with hot-swappable switches. I started with tactile switches, moved to linear, and eventually landed on a light tactile that gives feedback without fatiguing my fingers. The beauty of hot-swap boards is that you can experiment without buying a whole new keyboard.
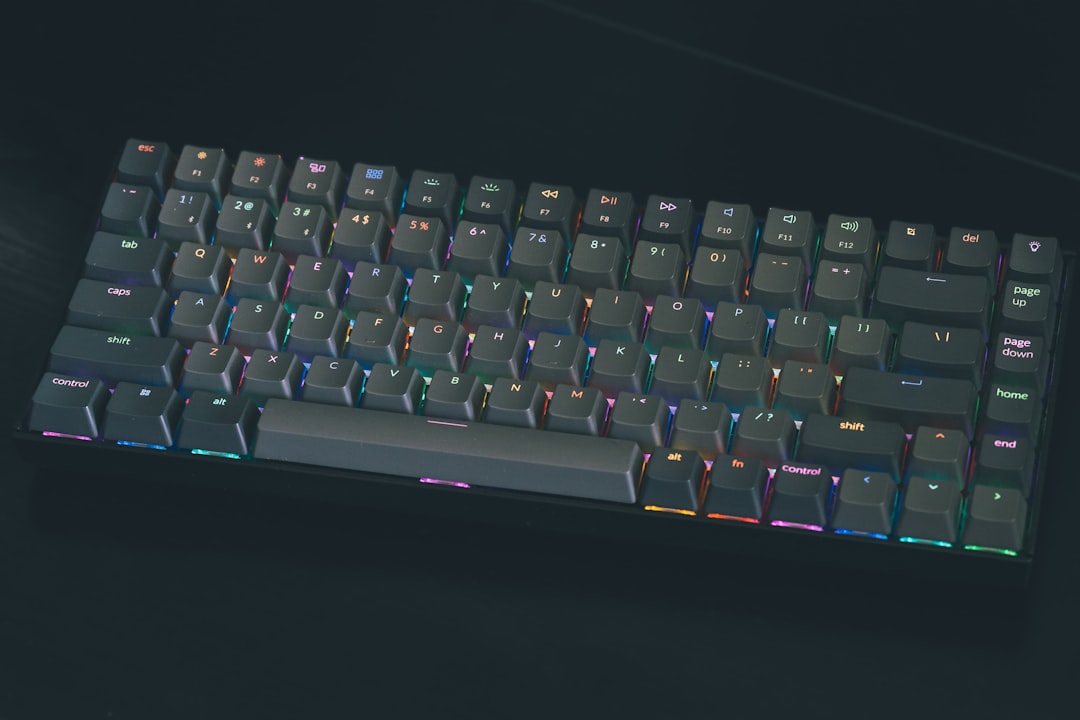
Pair that with a good ergonomic mouse — I went vertical after years of wrist pain from traditional mice — and you’ve solved the two things you touch for hours every day. Don’t cheap out on your input devices. A great keyboard and mouse won’t make you faster, but bad ones will absolutely slow you down and hurt you over time.
Lighting: The Overlooked Productivity Multiplier
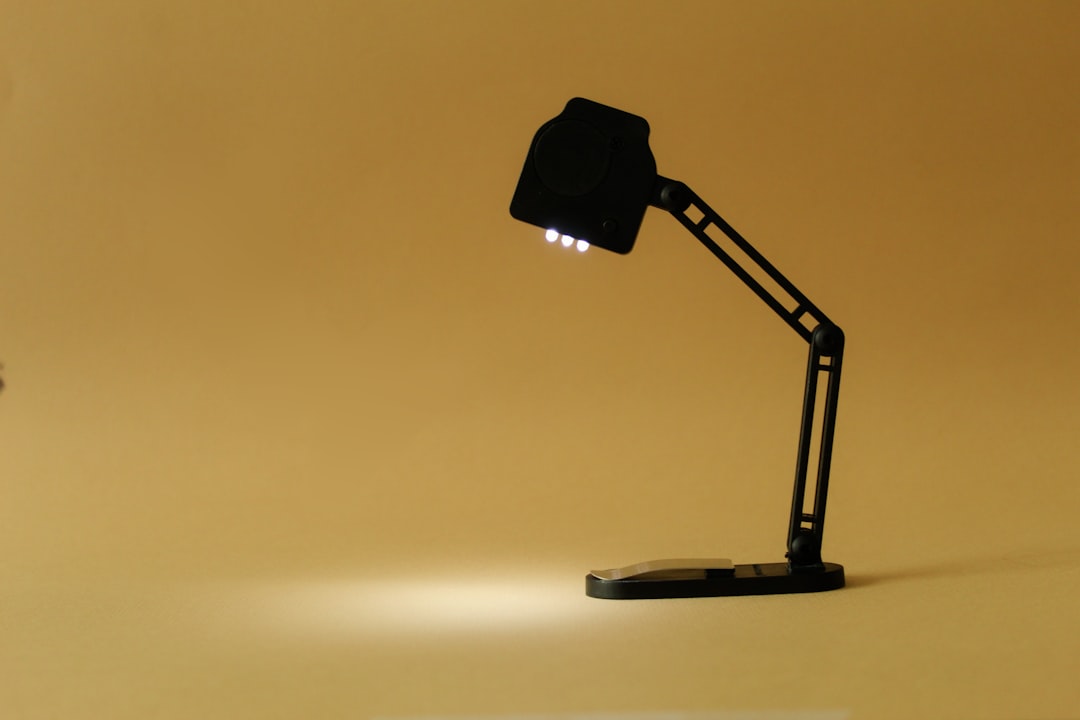
Here’s something I wish I’d learned earlier: your desk lighting matters as much as your monitor. I spent years working under harsh overhead fluorescents or, worse, just the glow of my screen. Switching to a dedicated adjustable LED desk lamp with warm-to-cool color temperature control reduced my eye strain dramatically, especially during late-night writing sessions. Warm light for creative work, cool light for detail-oriented tasks — it sounds like a small thing until you try it.
I also added a bias light — a small LED strip behind my primary monitor — which reduces the contrast between the bright screen and the dark wall behind it. It’s a $15 upgrade that makes extended screen time noticeably more comfortable. Your eyes aren’t meant to stare at a bright rectangle floating in darkness, and the bias light fixes that elegantly.
Connectivity: Docks, Hubs, and the One-Cable Dream
The goal of my setup rebuild was simple: one cable from my laptop to my dock, and everything else connects through that single point. I tested several USB-C docking stations before finding one that could handle dual displays, ethernet, audio, and power delivery without dropping connections or cooking itself under load. The right dock means you walk in, plug in one cable, and your entire workstation comes alive.
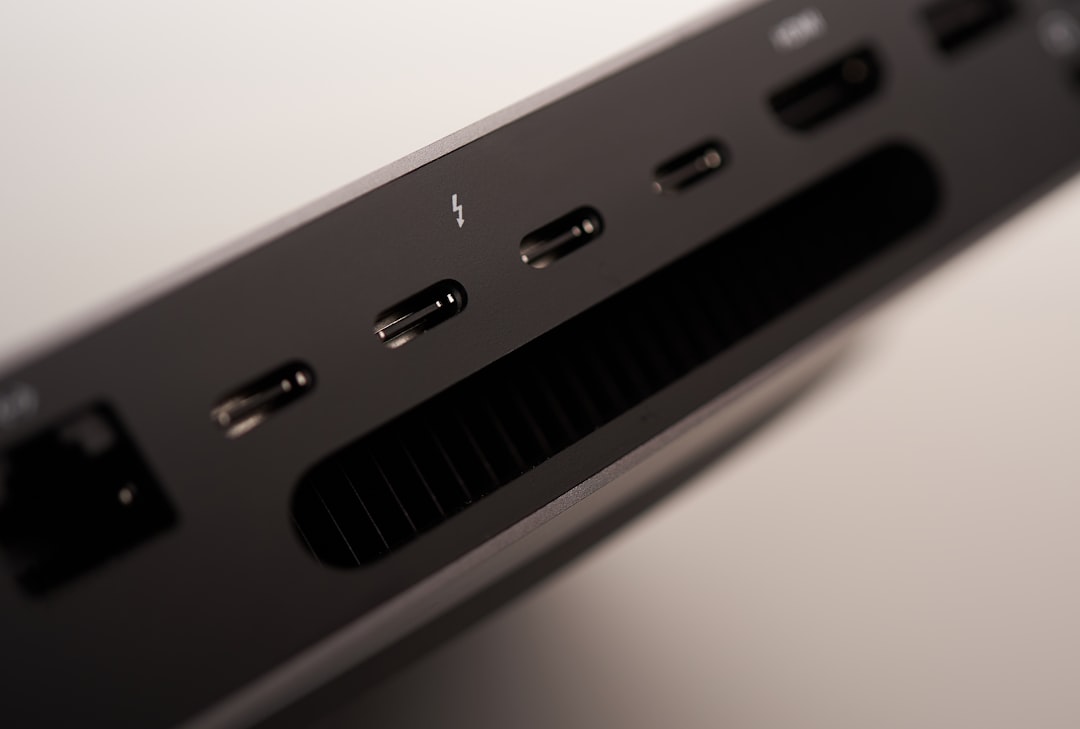
As I covered in my USB-C hub guide, the difference between a $30 hub and a proper $150+ dock isn’t just port count — it’s stability. Cheap hubs run hot, drop DisplayPort connections, and can’t deliver enough power to charge a laptop while running peripherals. Spend the money on a reputable dock and it’ll outlast several laptops.
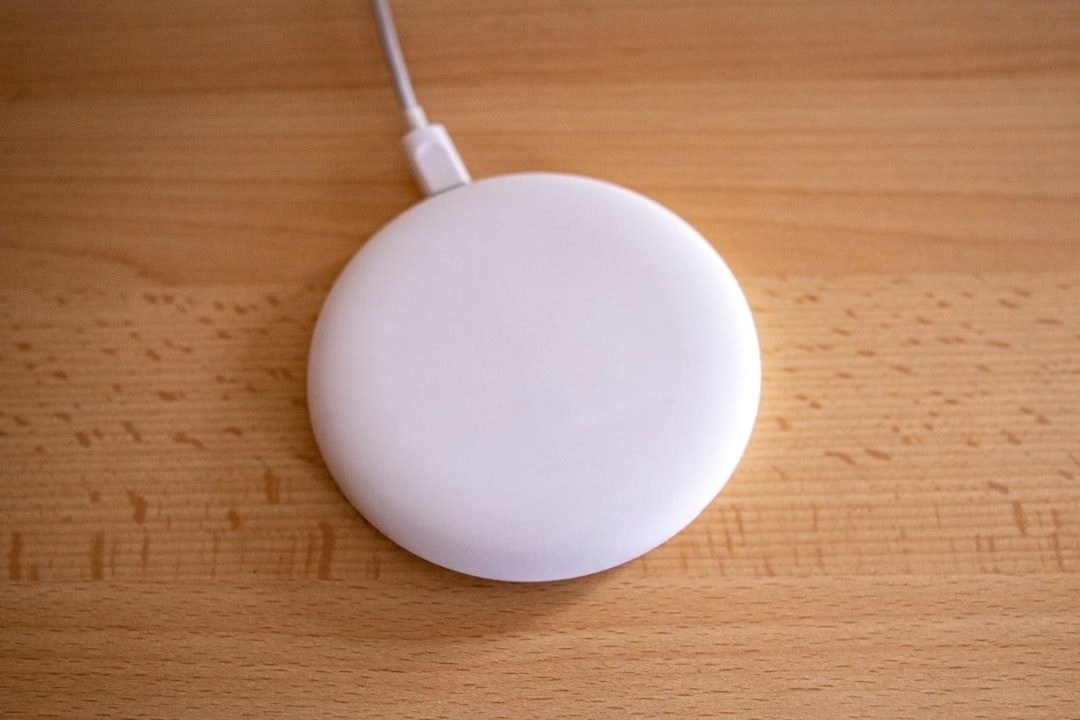
The Power Zone: Charging That Doesn’t Fight You
One corner of my desk is now dedicated to charging, and it’s the most organized part of my entire setup. A Qi2 wireless charging pad handles my phone, a magnetic cable keeps my earbuds topped off, and a powered USB hub handles everything else. The key insight: keep charging off your desk surface as much as possible. A small shelf or tray below desk level for power bricks and charging cables keeps the visual clutter down while keeping everything within arm’s reach.
I also swapped out the power strip under my desk for one with individually switched outlets and USB ports. Being able to kill power to specific devices without unplugging them — or reaching under the desk — is one of those small quality-of-life improvements that adds up over months of daily use.
What I’d Do Differently
Not everything went smoothly. Here are the mistakes I’d avoid next time:
I bought the monitor arms before measuring my desk thickness. The first set I ordered had clamps that didn’t fit my desk’s edge profile. Measure twice, order once — and check whether your desk has a flat edge or a beveled one.
I underestimated the cable management. I thought I could get by with a few zip ties. Turns out, proper cable management takes planning — map out where every device sits, where its power comes from, and how the cable routes from point A to point B before you start strapping things down.
I tried to do it all in one weekend. Building a great desk setup is more like decorating a room than assembling furniture. Live with each change for a few days before adding the next layer. Your wrists, eyes, and back will tell you what needs adjusting.
The Bigger Picture: Why Your Workspace Shape Matters
I’ve written before about building a future-proof home office, and this rebuild reinforced the core principle: invest in the things between you and your computer. Your chair, your desk, your keyboard, your monitor positioning — these are the things that determine whether you finish a workday feeling accomplished or feeling like you’ve been wrestling with your setup all day.
The total cost of my rebuild was around $800, not counting the monitors and laptop I already owned. That’s not trivial money, but spread across the thousands of hours I’ll spend at this desk over the next few years, it works out to pennies per hour for a workspace that actually supports the way I work. If you’re curious about the specific gear I mentioned, I’ve linked to search results throughout this article so you can find the options that fit your budget and needs. And if you want to see what other desk gadgets caught my attention recently, check out my roundup of surprises.
The best desk setup isn’t the one that looks the best on Instagram — it’s the one that disappears into your workflow so completely that you never think about it at all. That’s the real goal, and it’s worth every minute of planning to get there.